Relieve and prevent neck and shoulder tension with these
7 Yoga Postures
Would you like to relieve and prevent your neck and shoulder tension? Would you like to have more ease in your posture? Then you have come to the right place. Today I take you through some easy ways to reset your posture and create space and ease around the neck and shoulders with these 7 Yoga Poses.
With a lot of people now working form their computers for countless hours per day it is no wonder many people experience neck pain and tension. We are constantly hunching over and jutting our chins forward to see the screen better all of which pushes us into unhealthy postures. The following Yoga Poses and postural exercises will help relieve neck and shoulder pain but also help prevent the tension in the first place.
As Benjamin Franklin said:
“An ounce of prevention is worth a pound of cure.”
Firstly, let’s reset our posture
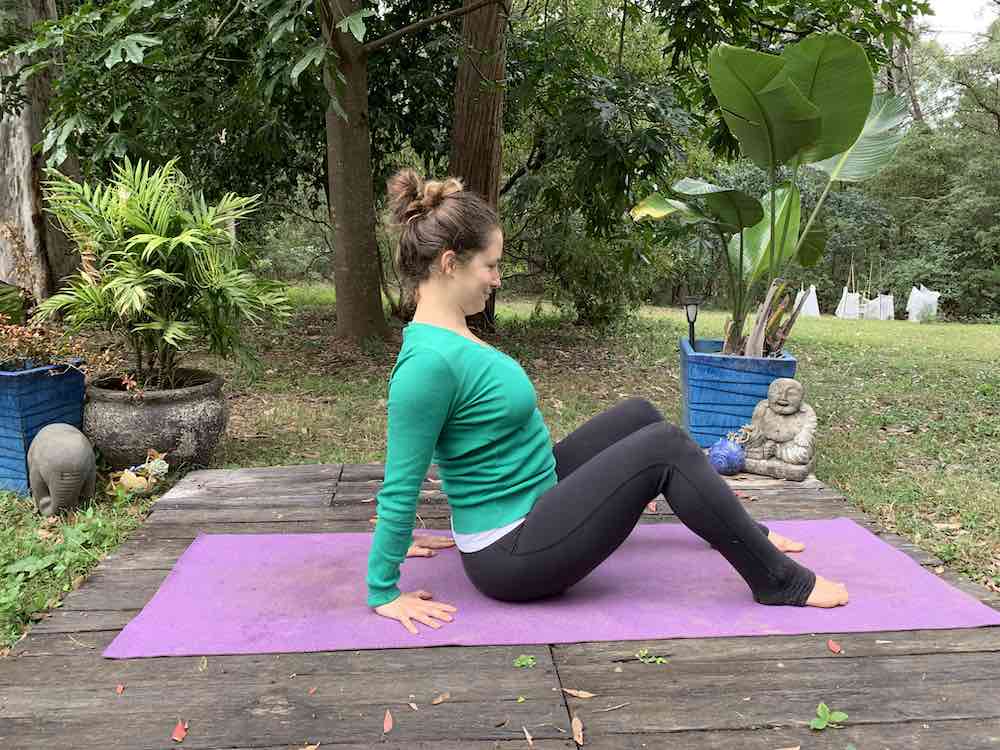
Before trying any of these Yoga Postures we want to firstly reset our posture. If you have been slumped over a computer all day, or slouching around on the couch, or perhaps working hard at the gym, your posture is most likely a little out. To reset and lengthen the shoulders and neck, try out these 3 little adjustments.
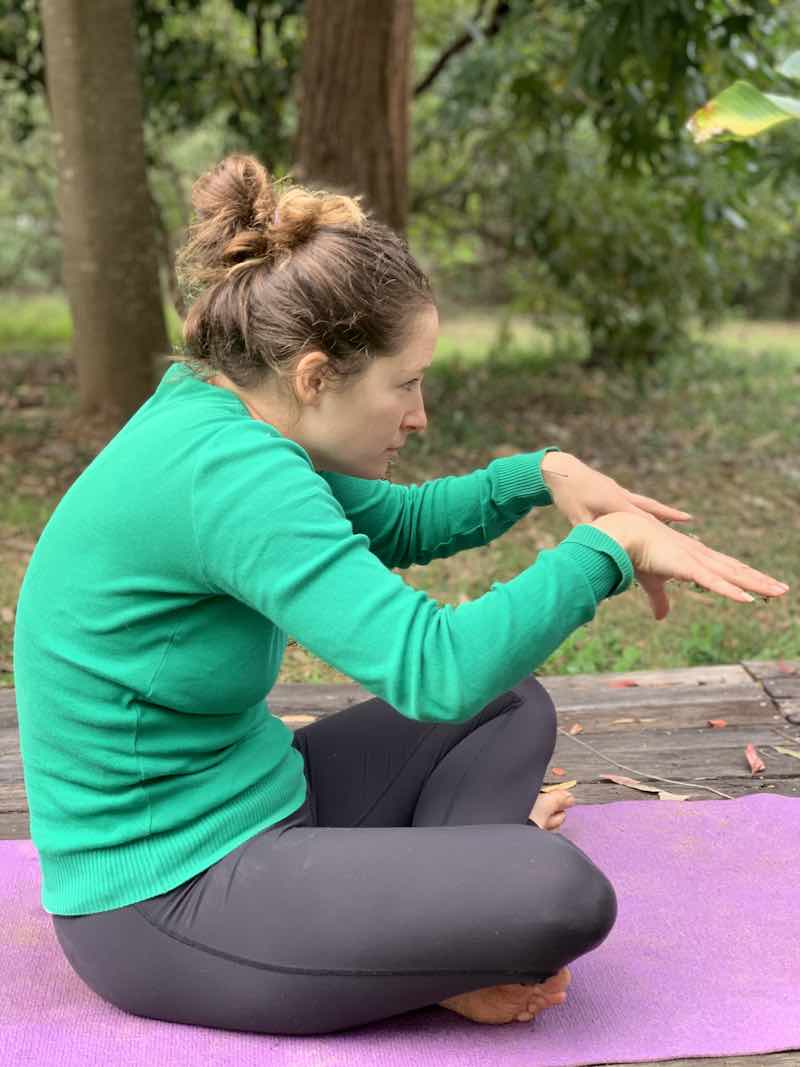
1. Draw the chin lightly in back towards the neck line
Start in a hunched position as if sitting at the computer desk. Notice how the chin protrudes forward when we gaze at the screen.
Now very gently use your index finger to press your chin back towards your neck. You will most likely notice that the spine starts to lift, the neck starts to lift and the back of the neck has more length and space.
2. Draw the shoulders back and down
Take the shoulders up around the ears and really feel the tension in the shoulders. Then draw the elbows slightly back and then draw the shoulders back and down. Try this a few times. You can even add an inhale to the lifting of the shoulders and an exhale on the drop of the shoulders to help relieve the tension even more.
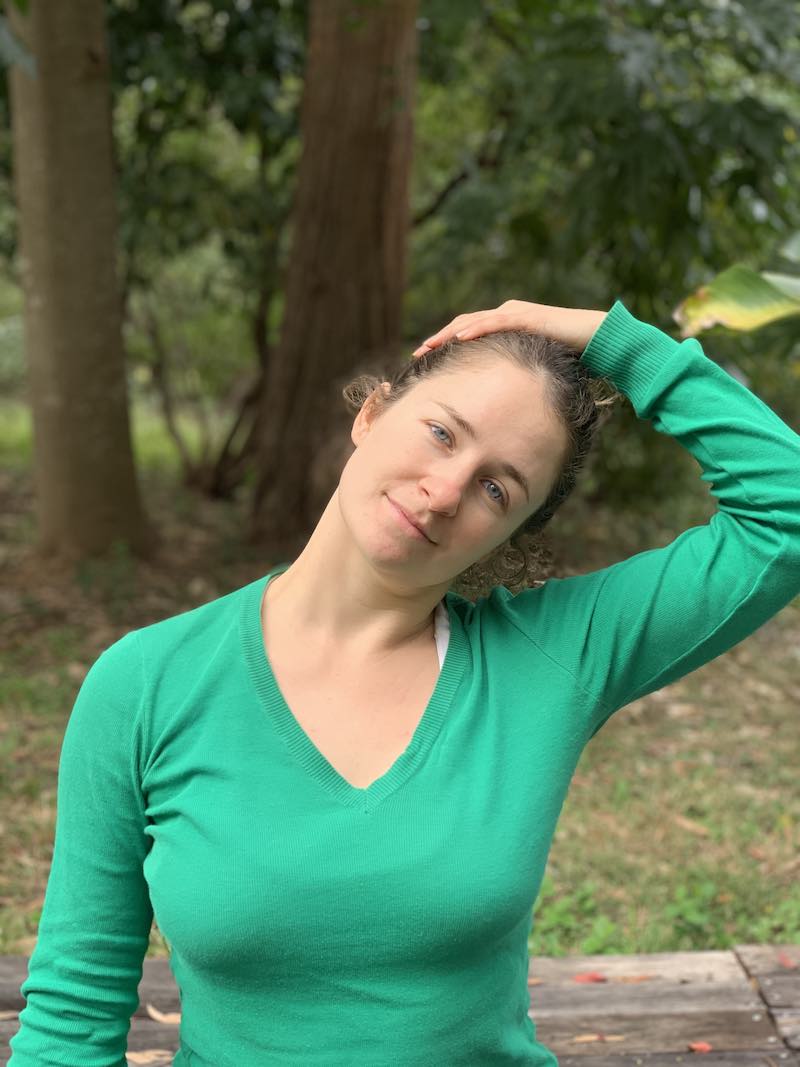
3. Stretch out the neck to create more space
Keep both shoulders down and back and even, then tilt the head to one side to stretch out the side of the neck. Use the weight of gravity to stretch the neck or if you want to intensify the stretch slightly, very gently take the hand of the opposite side being stretch and apply a very subtly amount of downwards pressure. Be sure to stay within your limits. You want to feel a stretch but you don’t want to feel any severe or sharp pain. If you do, back out of the stretch slightly.
You can then turn the head diagonally downwards to look towards your arm pit. Same thing, either use the weight of gravity to stretch the neck or very gently place some downwards pressure with the opposite finger tips.
Ok, let’s get into the 7 yoga poses to relieve neck and spine tension
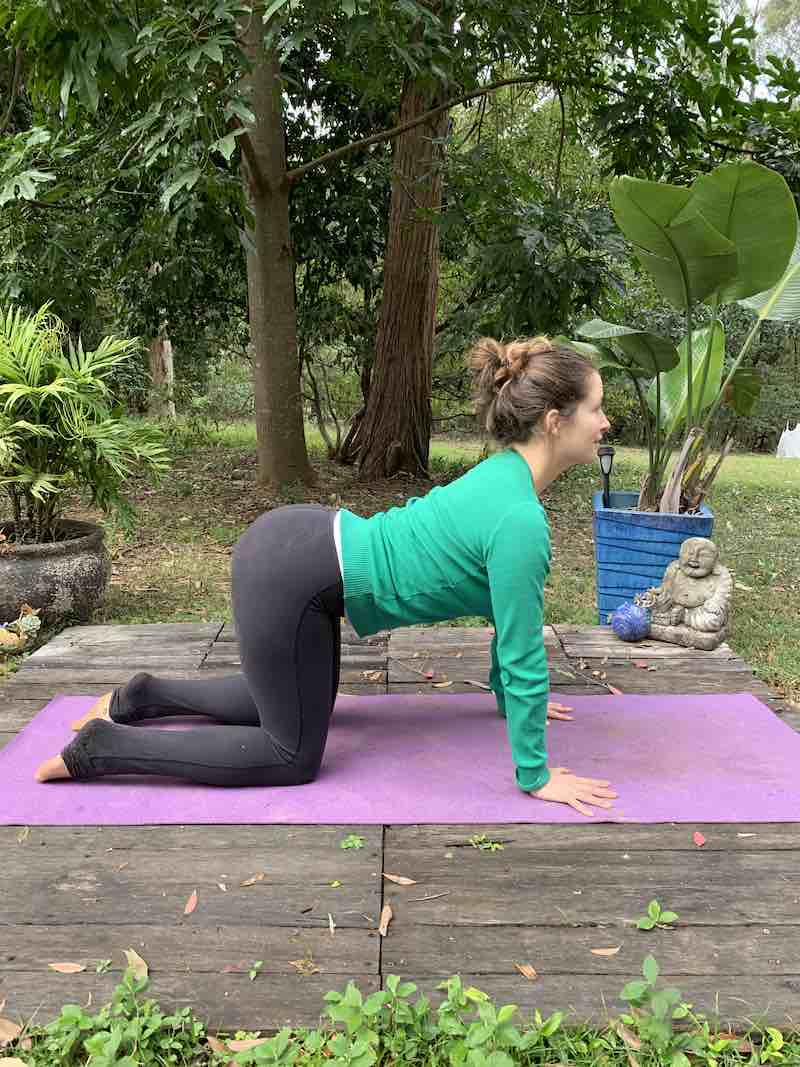
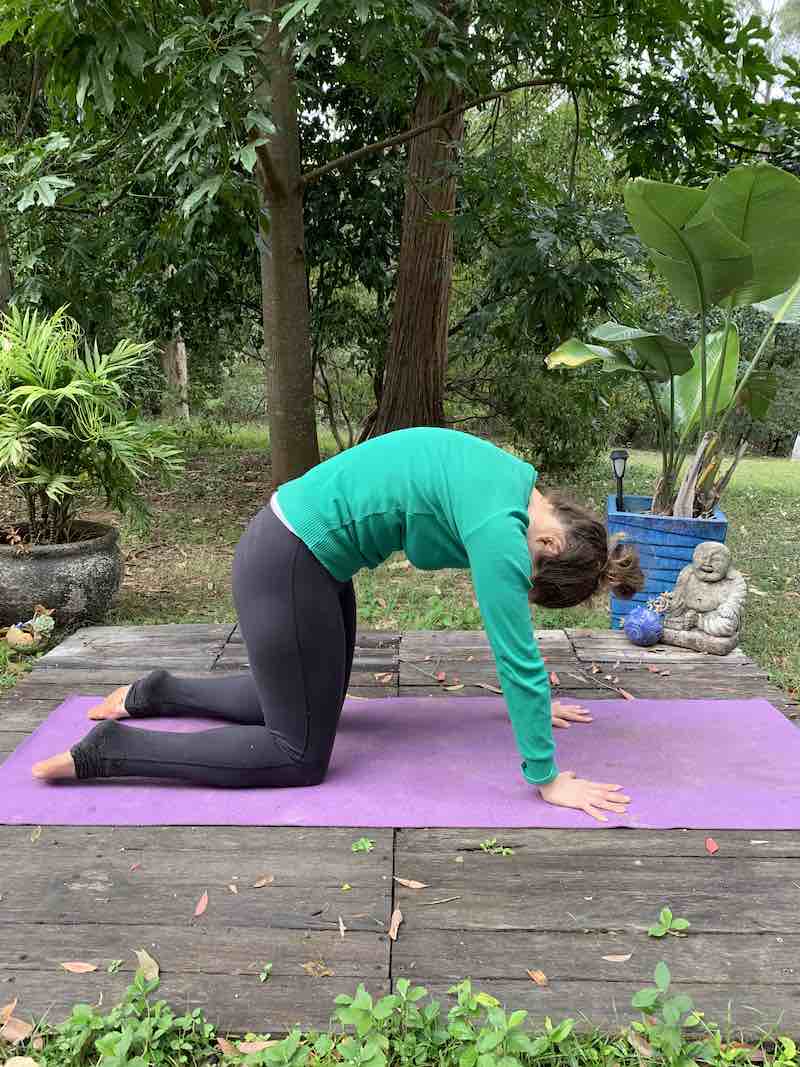
1. bidalasana
Bidalasana (“Cat and Cow Pose”) is a great warm up posture. When we stay in a hunched position for too long, our chest can get very tight and our upper back very sore. This posture is beautiful as it helps to open the heart space and front of the chest and creates more lubrication and ease in the spine.
Start on all fours with hands stacked directly under the shoulders and the knees directly under the hips.
Inhale, lead with chest forward and allow the sit bones to lift up towards the sky. On the exhale, draw the belly and chin in towards the spine as you curl the spine, lifting the back of the heart space to the sky.
Repeat this sequence 5-8 times.
If there is any discomfort in the neck and or back, make the movements smaller or just work with the movements that feel ok and keep the spine and head more neutral.
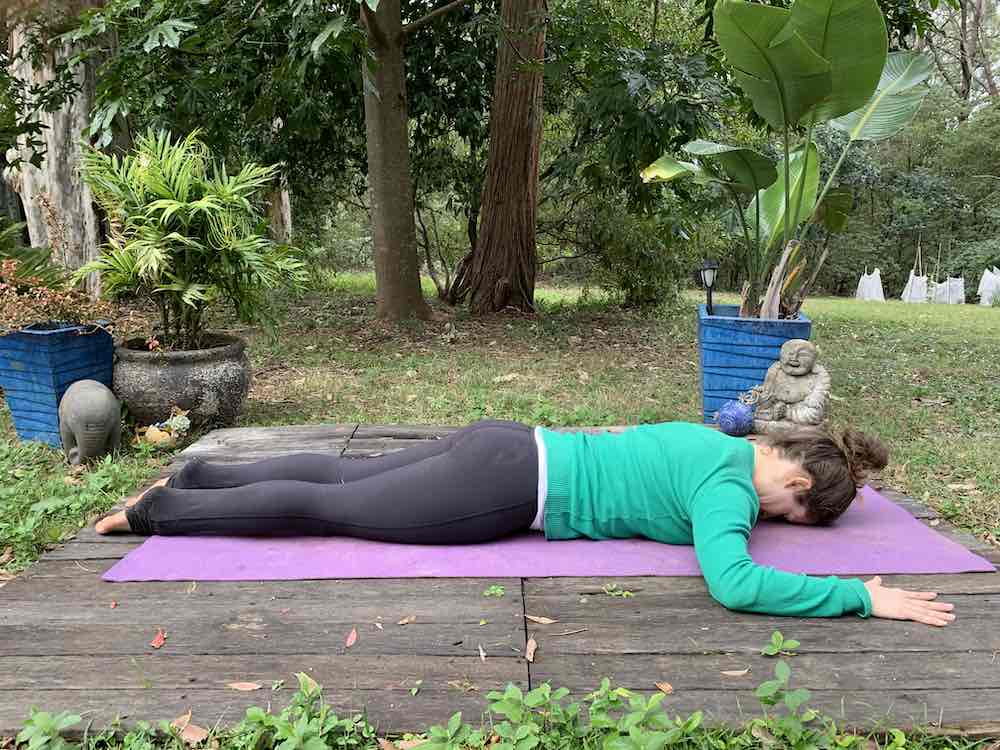
2. BHUJANGASANA
Cobra Pose
This posture is actually designed to prevent neck and shoulder tension. When we habitually hunch over a lot, our upper back becomes weak as it is constantly in a stretched position. Therefore our shoulders roll forward and our chest contracts even more. With this posture, we try to reverse this effect by activating the thoracic extensors (the muscles between the shoulder blades) which help draw the shoulders back and down. If we have strong upper back muscles then they can help support the shoulders by drawing them back and down, allowing for more openness in the chest.
Start lying down on your belly with the arms bent at 90 degree angle. Have the elbows in line with the shoulders. (Please note, this is slightly different arm positioning from traditional Bhujanagasana but this is to emphasise thoracic extension activation over back bending). Slightly draw the belly in towards the spine to support the lower back.
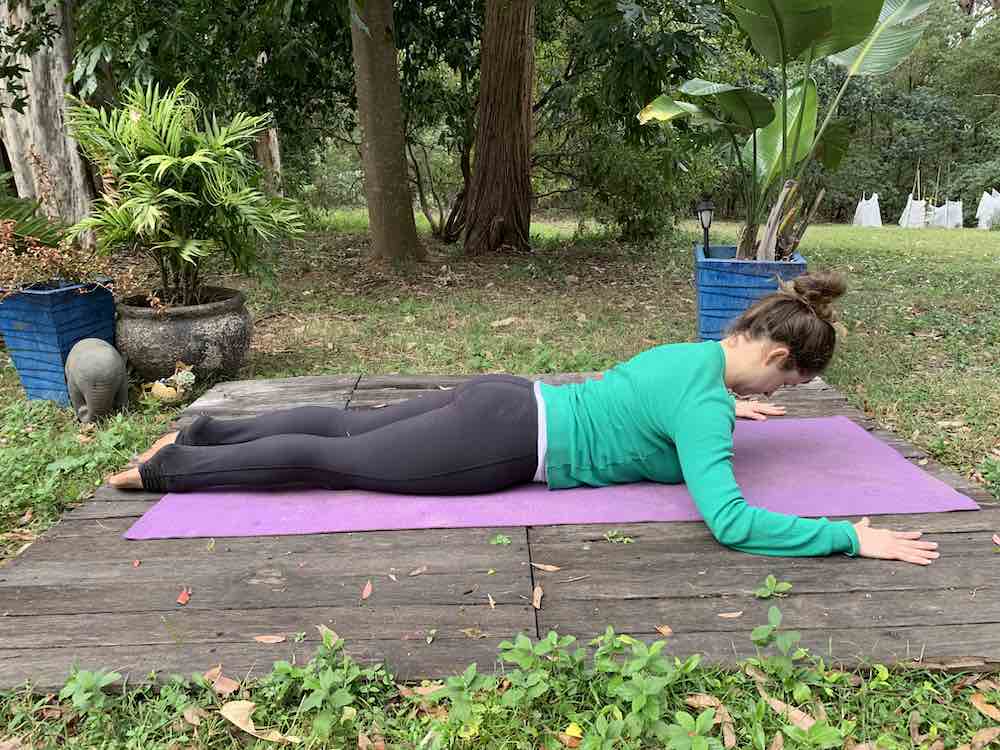
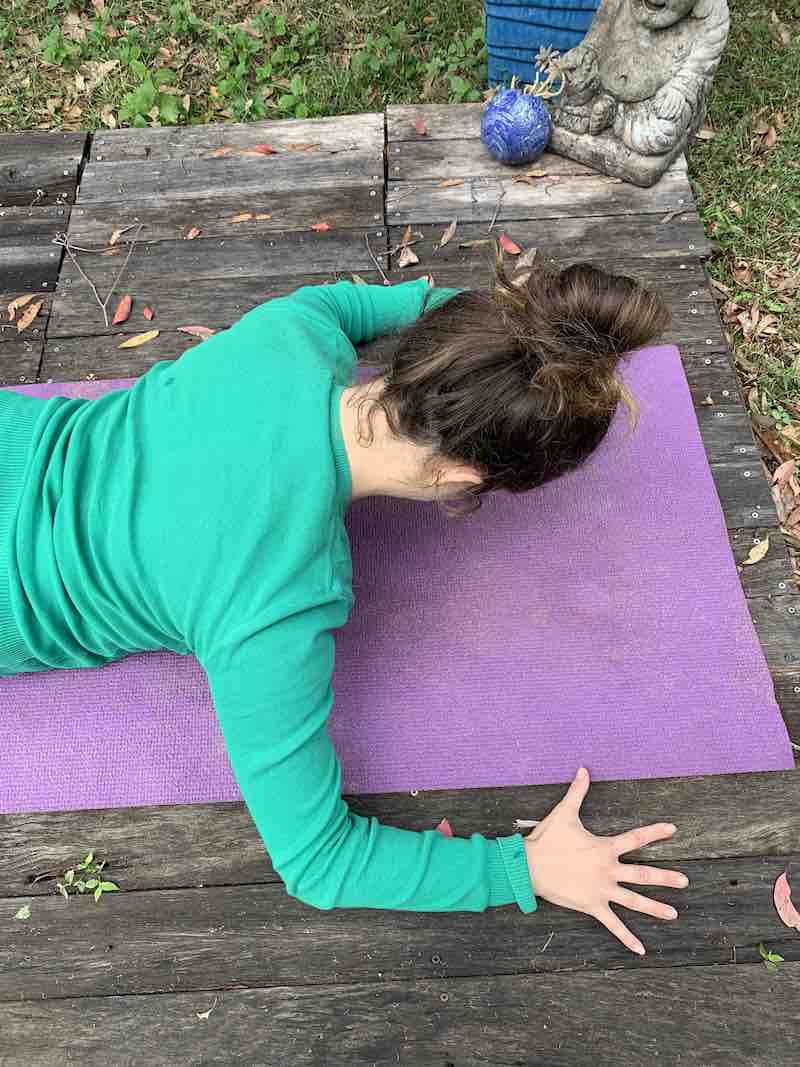
Inhale lift the head and chest off the floor, keeping the neck elongated and spine long. This posture is less about back bending and more about activating the upper back muscles to create a healthier support system for the shoulders. Try not to compress the neck by looking forward and instead keep the gaze at the end of the mat and back of the neck loong.
Exhale, keep lengthening the neck and spine as you lower gentle down to the ground.
Repeat 5 – 8 times only going as high as you feel the upper back working. If you start to feel this in the lower back then this could be a sign you have lifted too high, so lower and lengthen.
To finish, place the hands underneath the forehead and rest for a few moments. You can even wag your tailbone side to side if this feels nice.
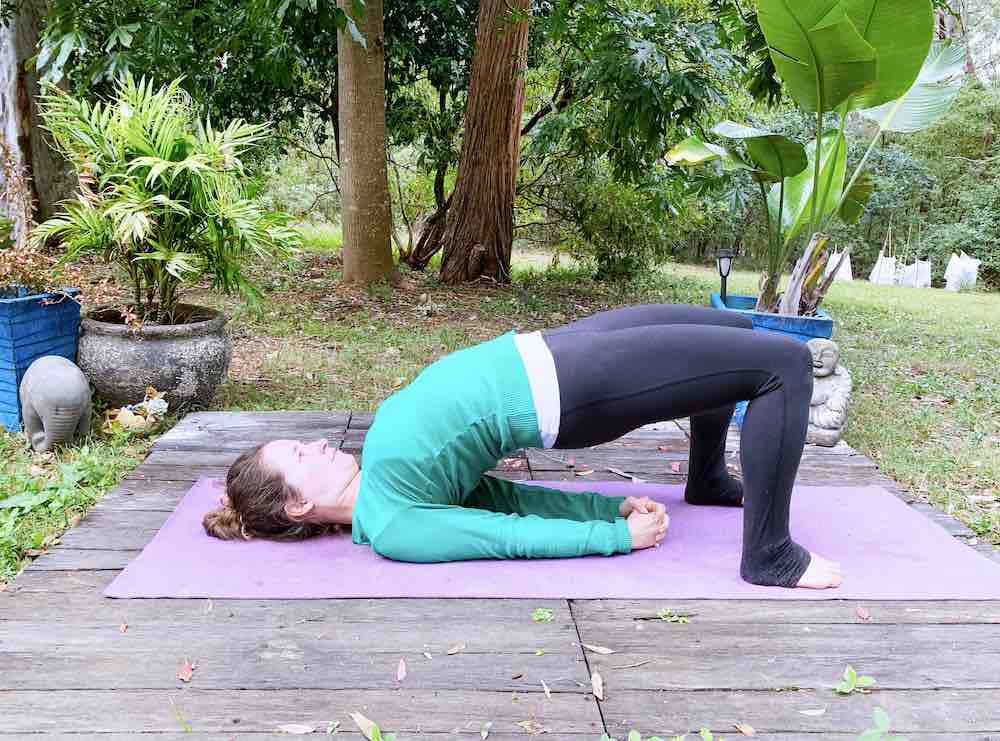
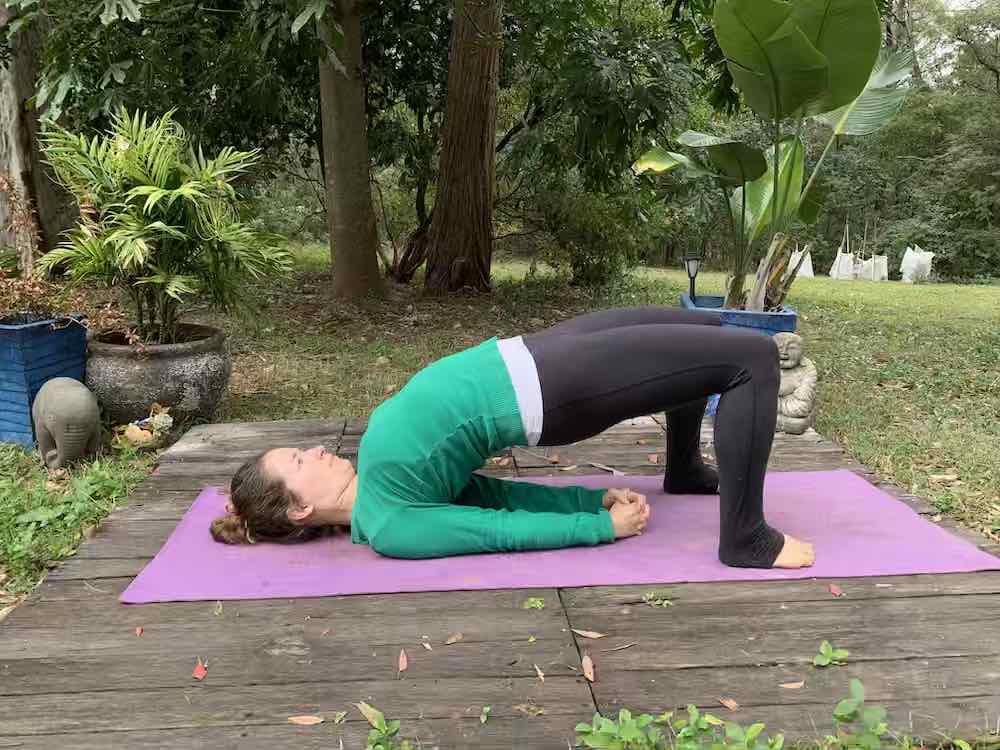
3. SETU BANDHA SARVANGASANA
Bridge Pose
This is a fantastic posture to open up the front of the chest and stretch out the back of the neck. There are two options I will offer up today – a gentle and a strong option.
Start lying on the back with the knees bent and feet hip width distance. To figure out the placement of the feet, stretch the arms alongside the body and reach towards the heels. When your middle finger brushes the back of the heel you are in a pretty good place but move accordingly if there is any discomfort in the knees.
PLEASE NOTE: If there is any discomfort in the lower back or neck, take the gentler option or avoid this posture.

GENTLE OPTION
Inhale, press the feet down to slowly roll the spine off the mat, vertebra by vertebra starting at the tailbone. Once the knees, hips and shoulders are in one line, pause.
Exhale, slowly lower the spine back to the mat, vertebra by vertebra starting from the top of the spine. Really draw the ribcage down towards the hips and belly in towards the spine to support this.
Repeat 5 – 8 times slowly and intentionally.
STRONG OPTION
Once you are in the top position, interlock the fingers of the hands and shrug the shoulders under the ribcage to open up the front of the chest. Think of lifting the heart space up towards the sky to increase the chest and shoulder stretch.
Hold 5 – 8 breaths then gently lower down
Finish by knocking the knees together, with feet out wide to reset the hips and lower back.
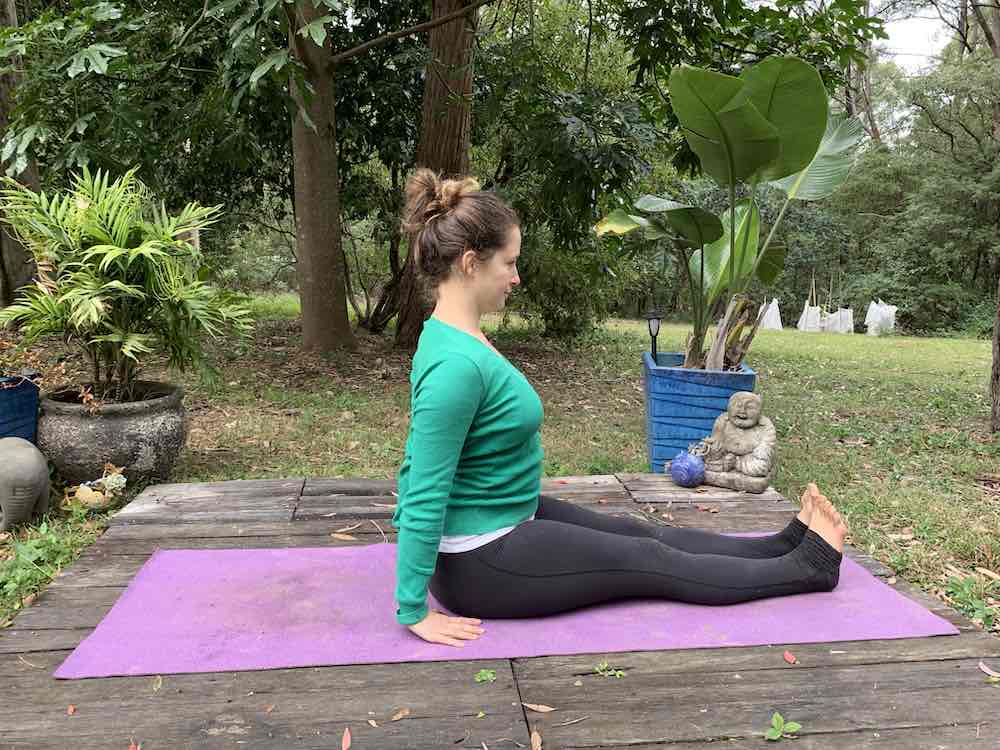
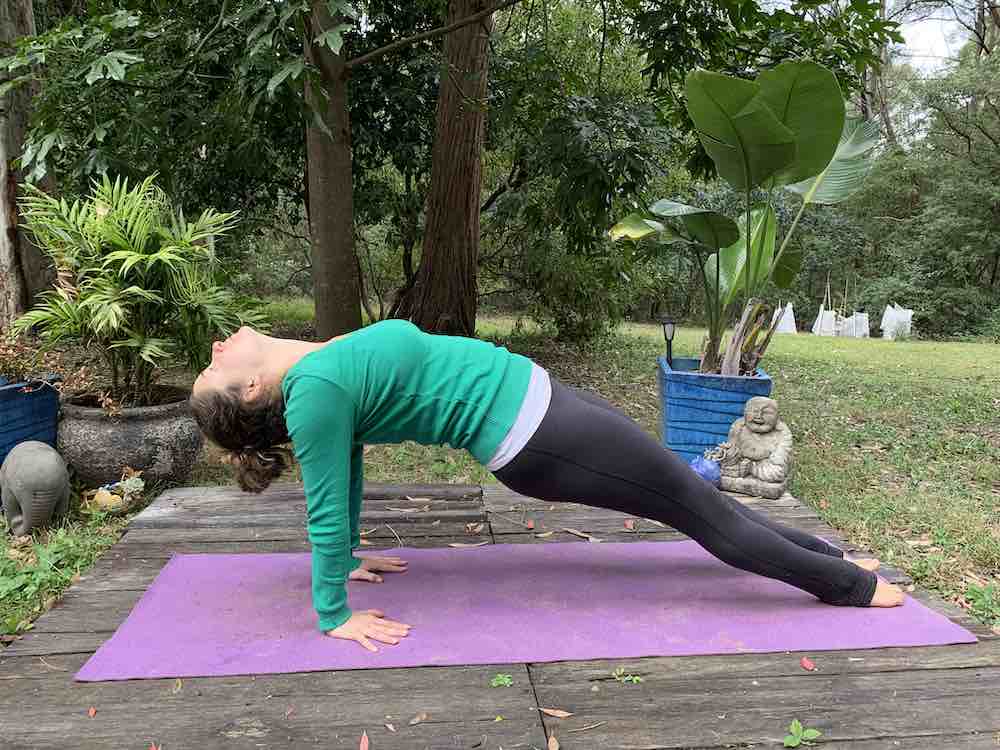
4. PURVOTTANASANA
Upward Facing Plank
This is a strong chest and front of shoulder opener and it can also help relax the neck. There are two options for this invigorating posture. If you have tight hamstrings, knee issues or any lower back issues I would suggest starting with the gentle option. Always listen to your body.
Start seated with the knees bent in front of the body, feet hip width distance apart and feet approx 1/2 a metre away from the buttocks. Hands are behind the hips, a little bit back from the buttocks. Fingers are facing forwards towards the toes.
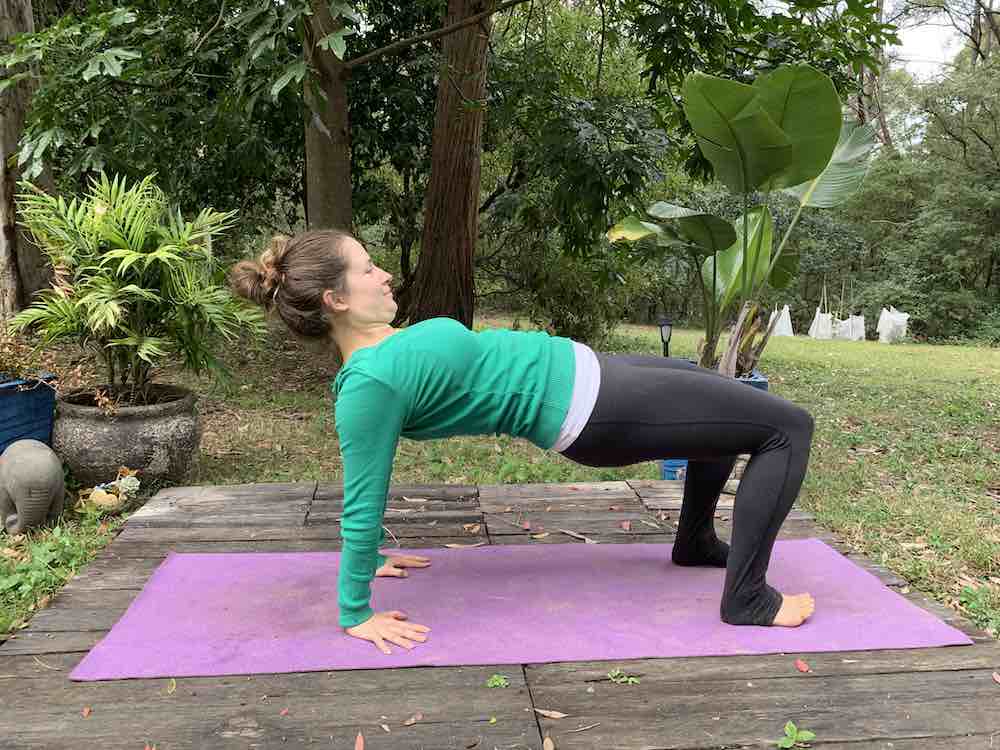
OPTION 1
Press the hands and feet into the ground as you lift your hips high. Press the hips up towards the sky to come as level with the knees and shoulders as you can. If you have any neck issues, keep the head upright looking towards the knees.
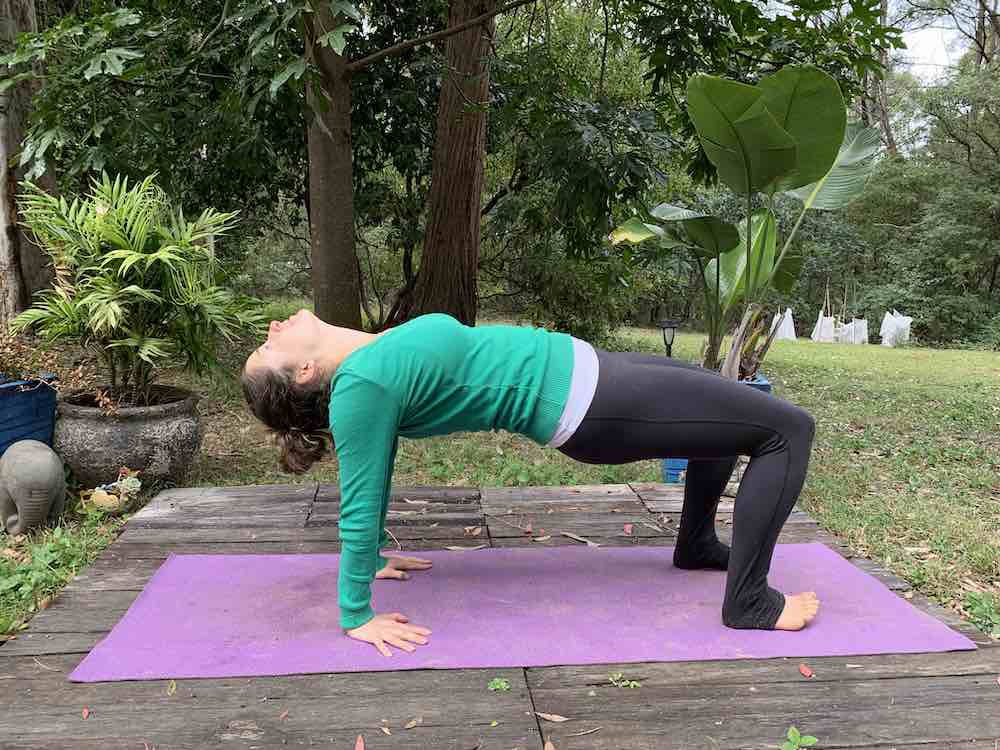
OPTION 2.
Once up in the position, gently lower the head back to stretch out the front of the neck. Please note: Only take this version if it feels ok with the neck.
OPTION 3.
Start seated with the legs stretch out in front of you, feet flexed. Hands go behind the back, a little away from the hips with the fingers facing forward towards the toes.
Press your hands into the mat to help lift your hips off the ground. At the same time point your feet and roll over the heels till the feet are flat. You are trying to make one long line from the toes to the head. Either have the head upright looking forward OR you can gently drop the head backwards to stretch the neck, only if it feels Ok for the neck.
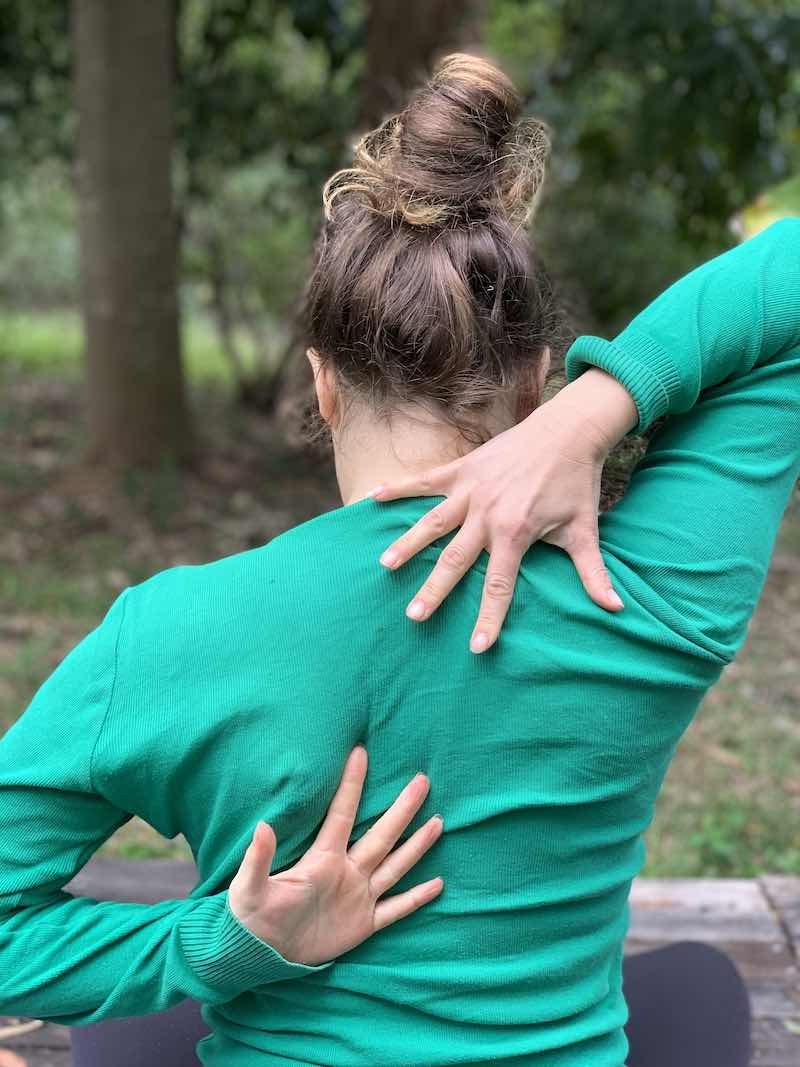
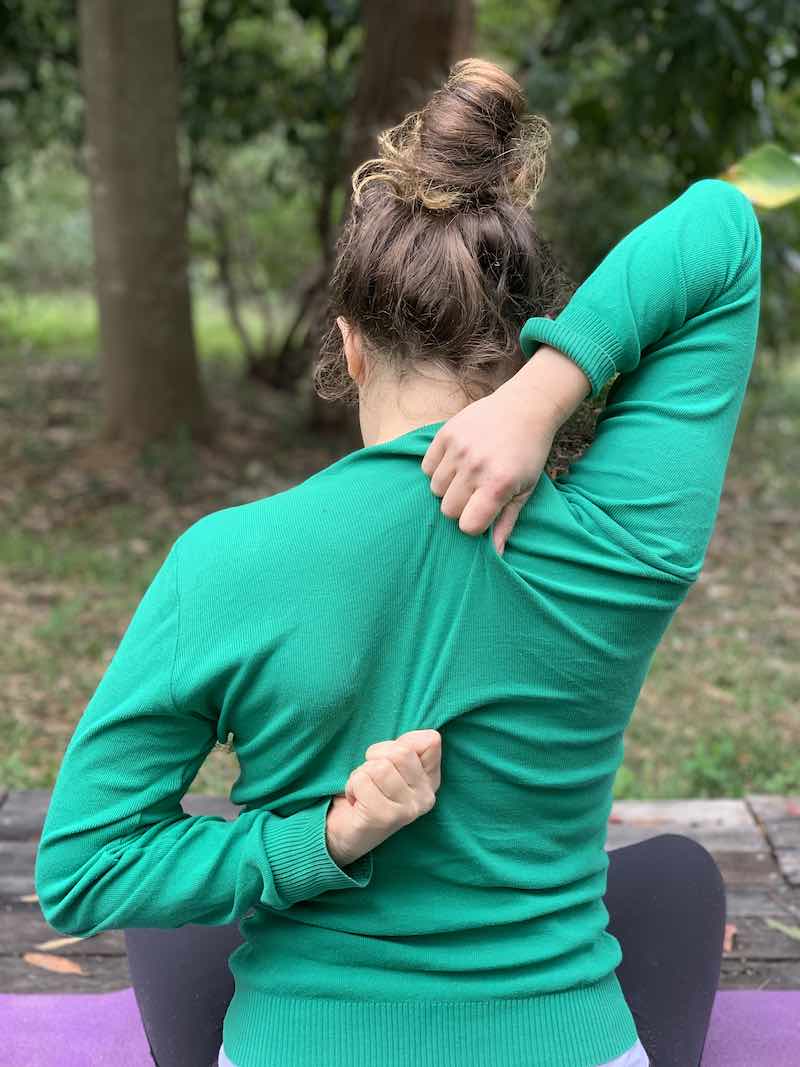
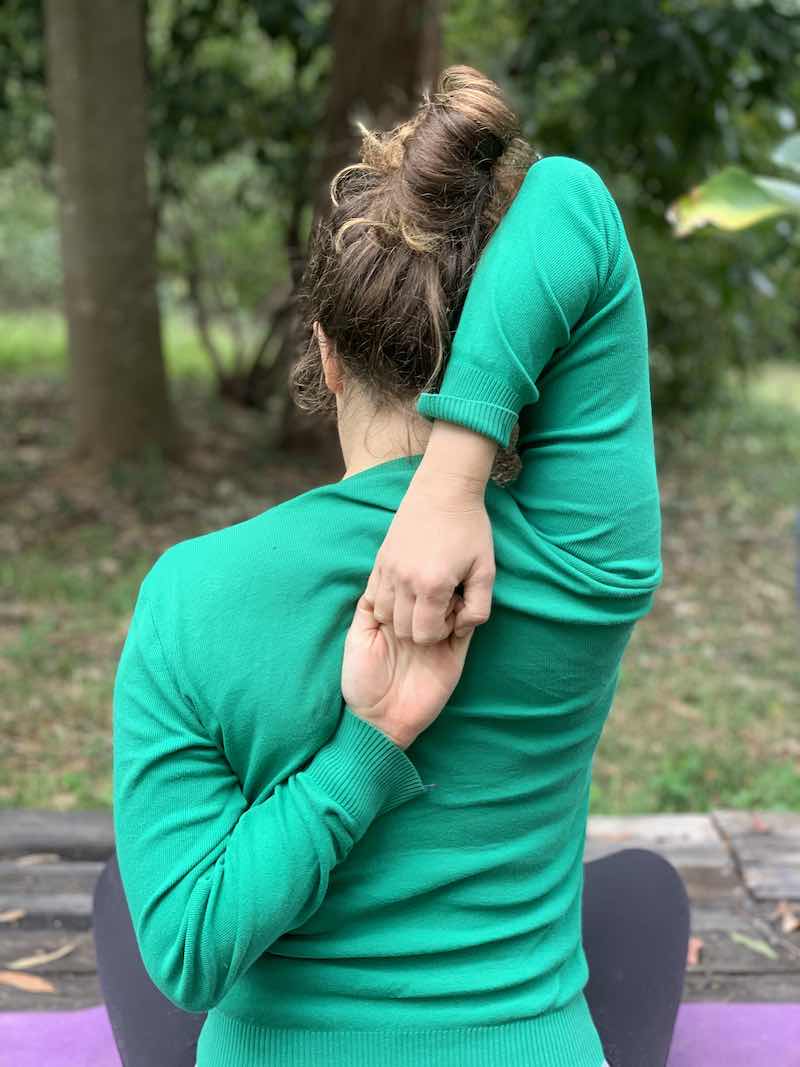
5. GOMUKHASANA ARMS
Cow Face Pose
Gomukhasana arms are a great way to stretch different parts of the shoulder region as well as the back of the triceps. Although these arms are often done with specific leg positions, today we are just focusing on the arms, so find a comfortable seat for you.
Start by taking one hand high to the sky, then bend it at the elbow to reach down the back (as if trying to give yourself a pat on the back). Then with the other arm, bend it at the elbow and draw it up the back to meet the other. Depending on the tightness of your shoulders you may or may not reach the other hand. Not to worry. See the two alternative options below.
In either option, try to keep the spine nice and tall.
OPTION 1
Simply reach the 2 hands towards each other.
OPTION 2
Grab onto your shirt or hold a belt in both hands that helps you to connect closer.
OPTION 3
Clasp both hands together.
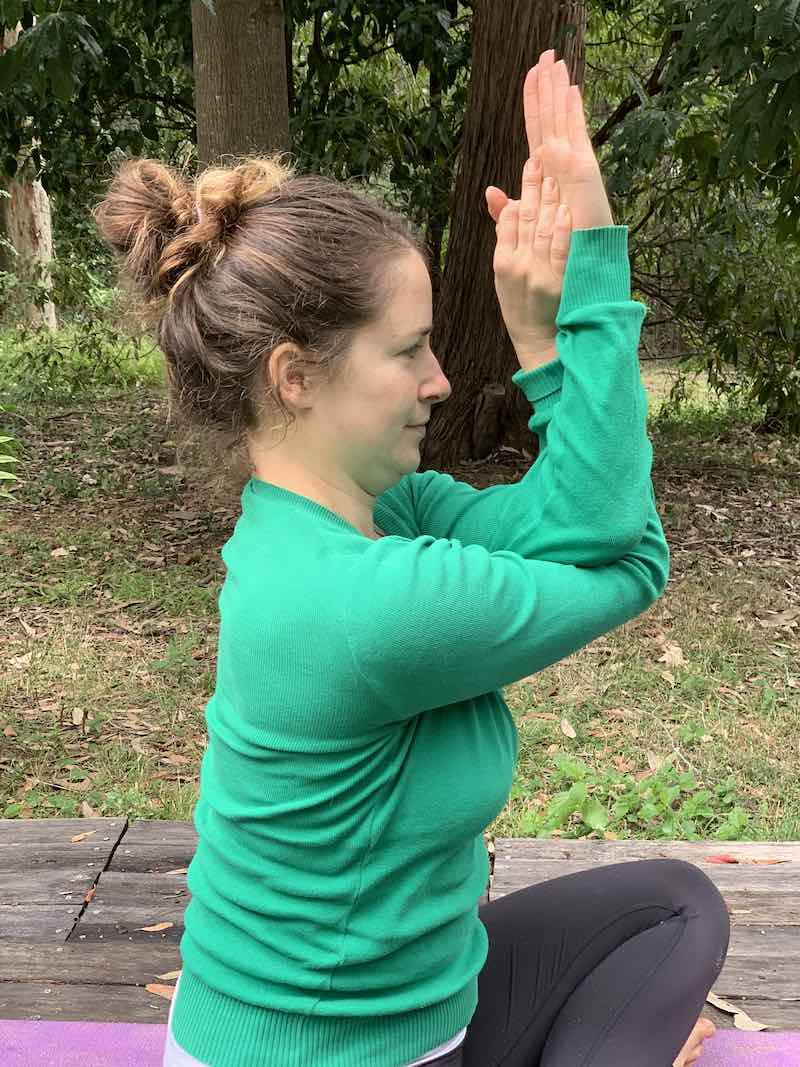
6. GARUDASANA ARMS
Eagle Arms
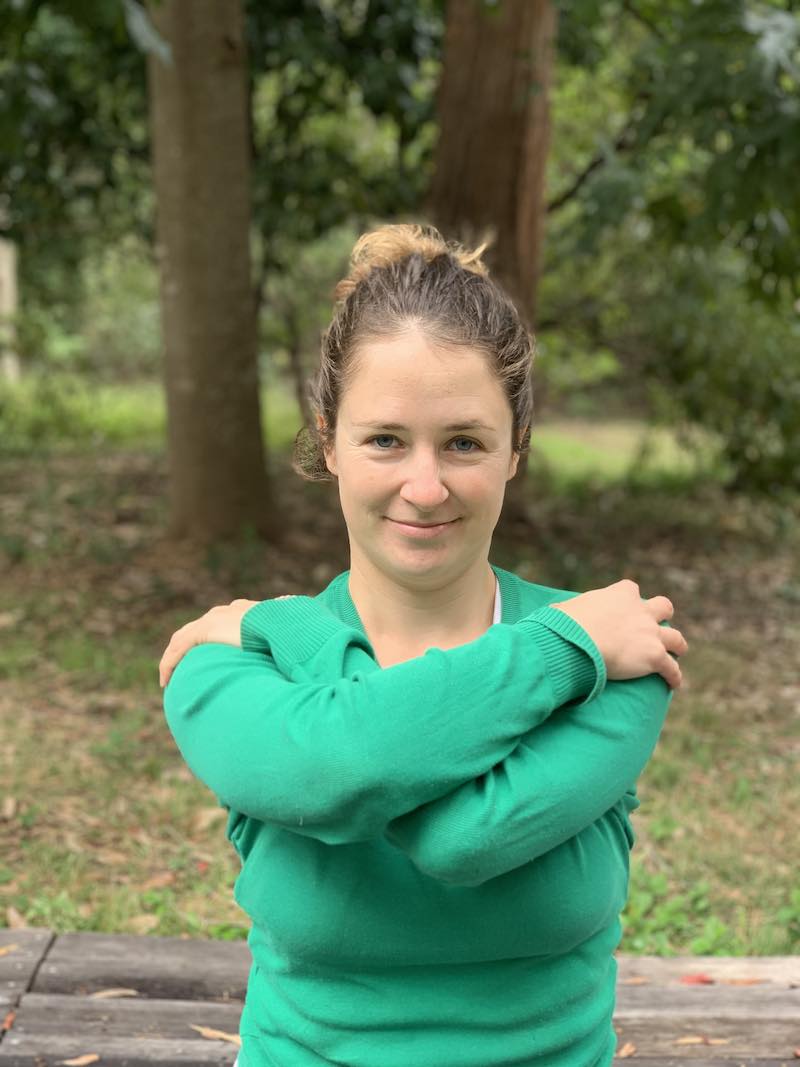
Garudasana stretches the back and sides of the shoulders and can feel like a nice warm hug. Today I offer here 2 options – a gentle and a strong. If you have tight shoulders it may be difficult to get into the full posture so just listen to your body.
OPTION 1
This is the option if you have really tight shoulders. Basically you are going to give yourself a hug – go on! Try to stack the elbows on top of each other if your range allows it. You can do this seated upright OR if you want to intensify the upper back stretch you can contract the belly to curve the spine.
OPTION 2
Stack both elbows on top of each other in front of your body. Then lift the arms up towards the sky so the back of the hands can try to connect here. Pause here OR you can add one final twist by then trying to wrap the hands around to bring the palms together (ie. into prayer position).
Keep the shoulder blades back and down, the spine lifted and then lift the elbows slightly. This might be quite an intense shoulder stretch so really listen to your body.

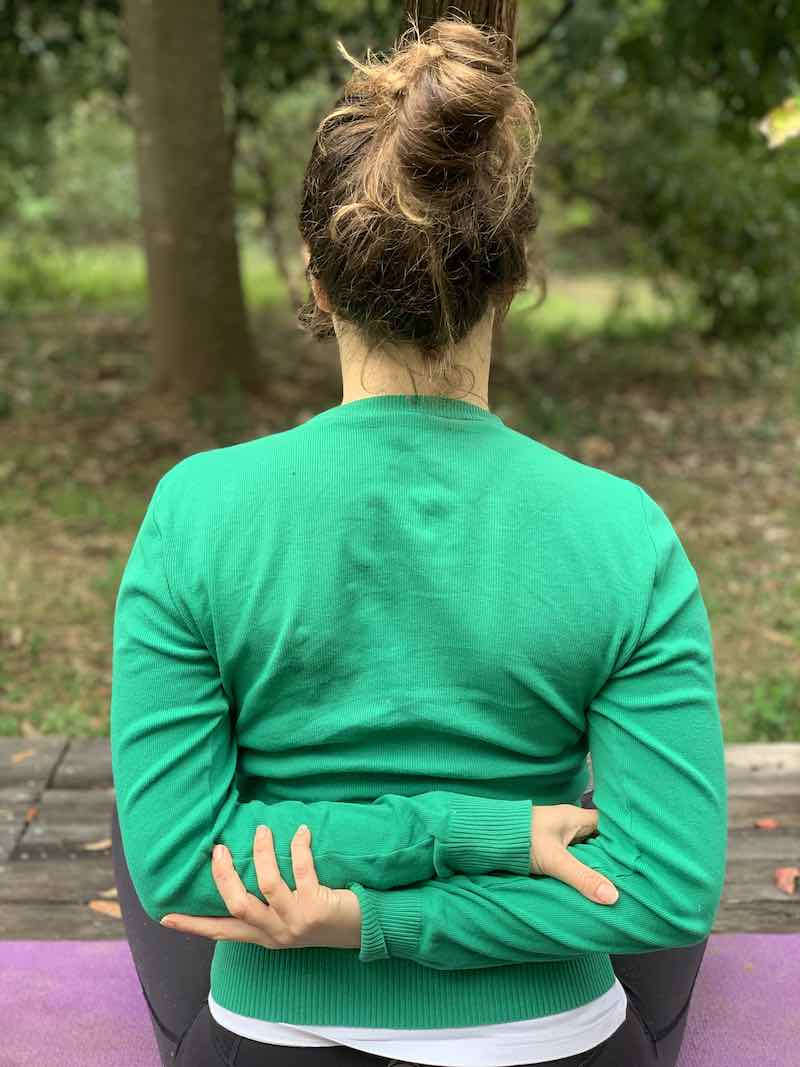
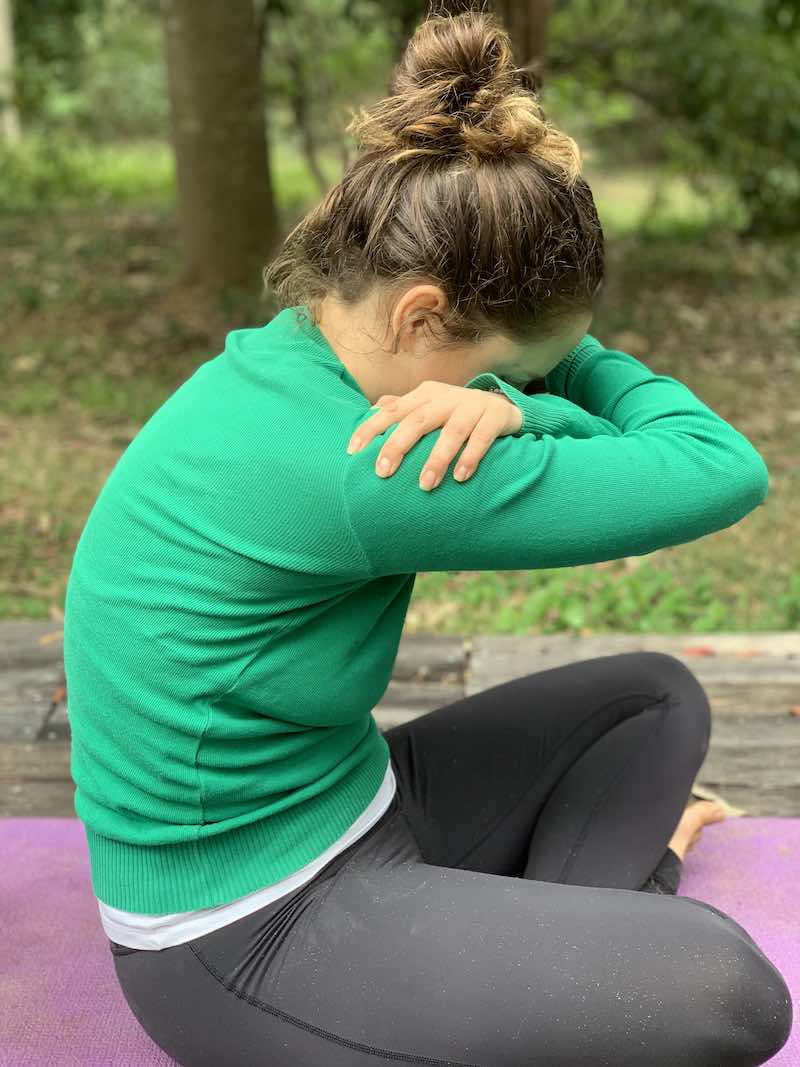
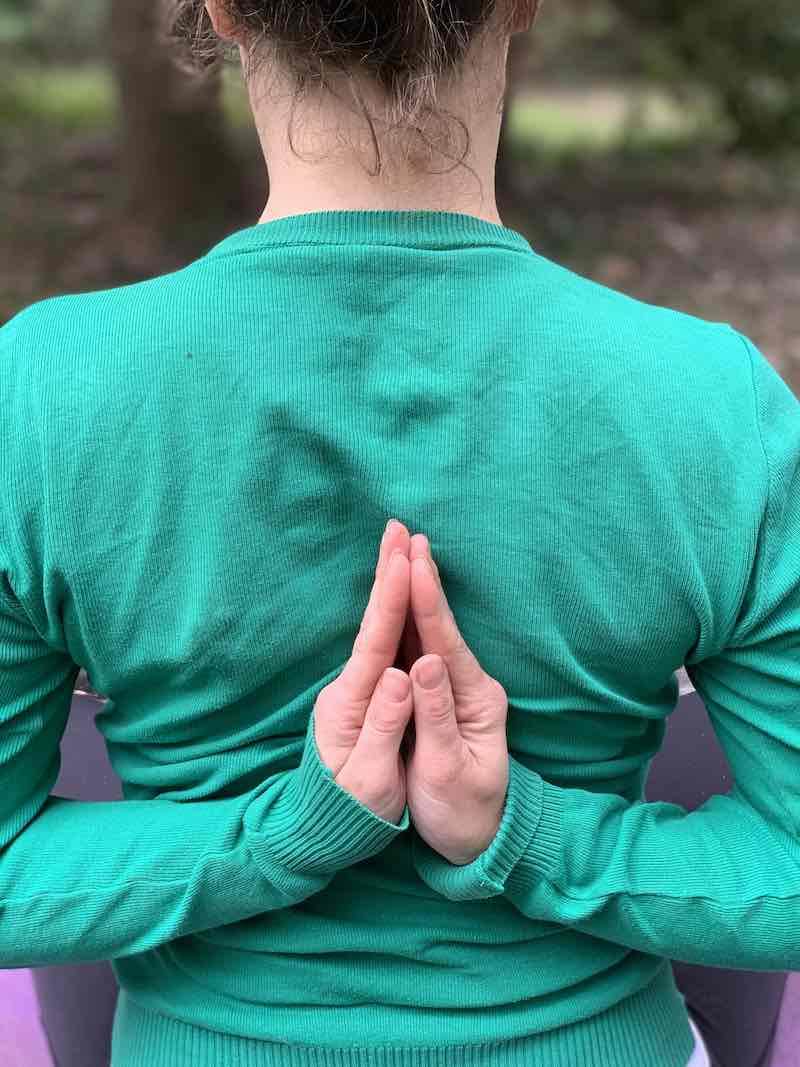
7. reverse prayer
Another juicy shoulder and front body stretch. There are two options for this as getting into the full variation can be quite tricky, especially if you have tight shoulders. Once you have chosen your arms position, sit tall and you might even want to close down the eyes for a moment and take a few moments of mindfulness or meditation.
To enter into this posture, find a comfortable seat and then either hold onto the elbows behind the back or rotate the hands behind the back to meet in prayer position.
Enjoy these Yoga Postures that relieve neck and shoulder tension. Feel free to do them all in sequence as laid out above, or chuck in the odd posture here and there throughout the day to prevent neck and shoulder tension. As I quoted earlier, “An ounce of prevention is worth a pound of cure.” Thanks Benjamin Franklin.
If you are looking for regular classes to help maintain your health and posture, why not try out my online studio Omunay where I have hundreds of classes in Yoga, Dance, Pilates, and Meditation. There, you will also find a full guided class of the sequence above.
Peace,
Emma
DISCLAIMER:
Please note the guidance offered on Omunay is not meant to replace medical advice. Whilst care is taken in providing safe guidance, Omunay cannot take responsibility for any adverse effects from your practice. Please seek medical advice before undertaking the training provided on Omunay and listen to your body at all times to ensure the safest possible practice. Omunay will not be held responsible or reliable for any injury or harm sustained due to practising with the online videos either through YouTube or the www.omunay.com website. This includes emails, videos, and text. Omunay thanks you for your understanding in this matter.
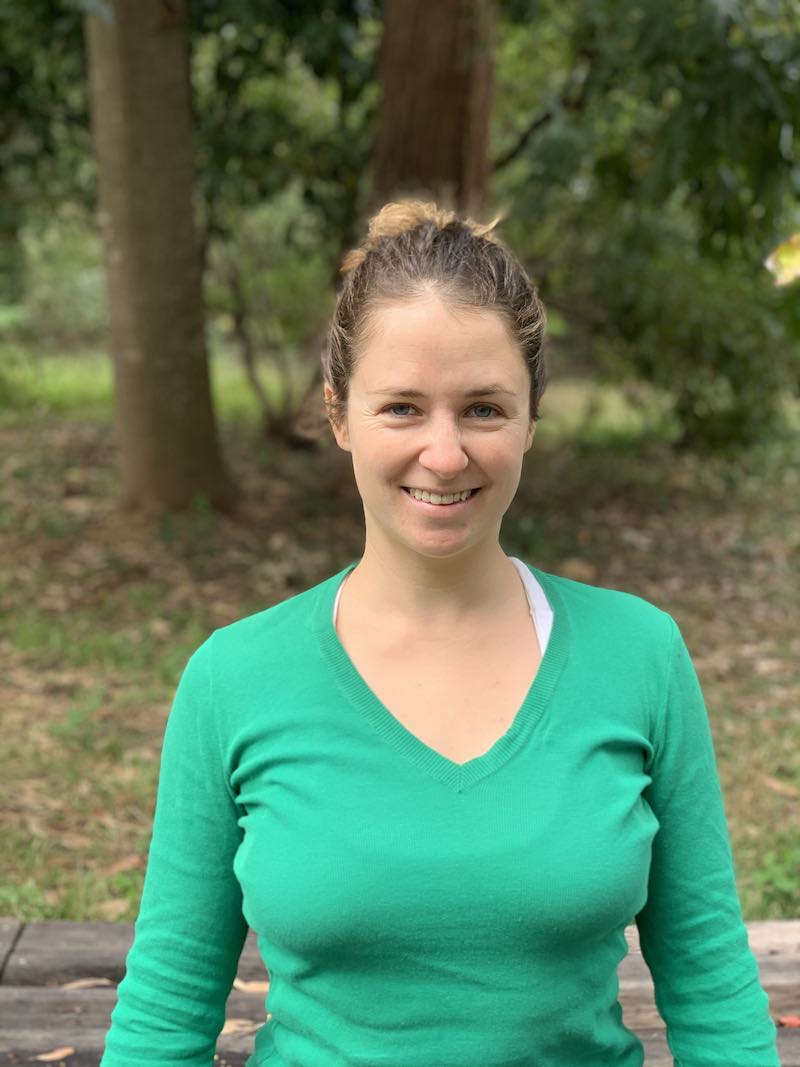
About the Author
Emma Hawthorne is a professional Singer and Dancer as well as Yoga and Dance Instructor. She has toured with many Australasian tours of Musicals including Wicked, Hair, Mamma Mia, West Side Story, and Dr Zhivago. She frequently teaches Yoga and Dance at the Sydney Dance Company Studios as well as other studios in and around Sydney. She also has on online studio omunay.com where she has hundreds of online classes in Yoga, Dance, Pilates, and Meditation. Emma is currently living a self-converted bus home called ‘Winnie the Mini Bus’ and travelling around Australia.

For unlimited classes in Yoga, Dance, Pilates and Meditation by Emma, head to omunay.com and start your 7 Day Free Trial today!